I'm excited to finally show you my apron and show you how to make your own! I'm mostly settled into my new apartment now and am busy getting my new crafting area ready for some quality crafting time.
Materials:
-0.5m navy polkadot fabric
-0.75m bright pink fabric for band & strap
-scrap polkadot fabric for pockets
-2.5m of lace
Step 1: Cut Apron Pieces
Here are the measurements I used (length x width):
Top or 'Bodice' = 10" x 13"
Bottom or 'Skirt' = 18" x 22"
Waistband = 76" x 4" (I pieced several strips together to get this length) Cut 2!
Neck strap = 20" x 3"
Pockets = 5" x 6"Cut 2!
Step 2: Trim
Round the top corners of the bodice piece and the bottom corners of the skirt piece.
With RIGHT sides together, trim the ends of your waistband on a 45-degree angle.
Step 3: Attach Lace
With right sides together, sew lace around the top and sides of the bodice using a zigzag stitch (seam allowance will depend on the width of your lace). Press seam to the inside and topstitch the edge, making sure to catch the seam underneath - this will keep your lace laying flat. Repeat for the bottom and sides of the skirt.
Step 4: Gather
Using a running stitch, gather a few inches on the bottom of the bodice and the top of the skirt. Stitch in place.
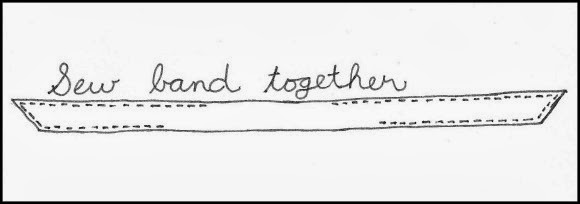
Step 5: Sew Band Together
With right sides together, sew the waistband pieces together, leaving an opening at the top wide enough for the bodice (approx. 13") and an opening on the bottom wide enough for the skirt (approx. 20"). Use a 1/2 inch seam allowance. Flip right side out and press.
Step 6: Piece the Apron Together
With right sides together, attach the bodice to the top front piece of your waistband and the skirt to the bottom front waistband. Use a 1/2 inch seam allowance. Press seams toward waistband.
Flip your apron over to the backside, and there will be two openings where the bodice and skirt pieces meet the waistband. Press the opening of the waistband under 1/2 inch. Pin in place so that the front waistband and back waistband are lined up. Then top stitch the entire edge of the waistband - this will close up the openings that were on the reverse side of the apron.
Step 7: Sew the Neck Strap
Fold the neck strap in half lengthwise with right sides together and stitch it up. Flip right side out, press and topstitch. (Okay, so topstitching is not totally necessary, but I'm so much happier with the end result when I do it!)
Step 8: Make the Pockets
Trim the bottom corners of the pockets to round them out.
Make a pleat down the middle of the pocket. Play around with pleats (or gathering) until you are pleased with the result. I ended up with a 1" wide pleat at the top and a 5/8" wide pleat at the bottom. Stitch in place.
With right sides together, sew the lace to the top of each pocket. Press the seam to the inside and topstitch.
Step 9: Attach Strap and Pockets
Pin your strap to the back side of the apron bodice. It's a good idea to try it on at this point and adjust the angle (or length!) of the strap to fit properly. Sew in place and reinforce by adding a second row of stitches 1/8" to 1/4" above your first row.
To attach the pockets, press under 1/4" along the side and bottom edges. Pin them to the apron skirt (again, try it on and adjust as necessary), and topstitch in place.
And now you have an adorable apron to wear whilst making pies or whatever your baking vice may be!
What I enjoyed the most: I really enjoyed making this apron pattern up as I went along. I am a fairly methodical type of person and like processes to be well organized. So it was a good exercise for me to freestyle my cutting, and not know where to place my pockets or how to attach the waistband. I just had to figure it out and make mistakes.
Next time I would...Play around more with the shape and maybe try a less conventional style of apron. I've made aprons before with a similar shape to this one, so maybe I should try something new? I'm intrigued by vintage aprons that look more like dresses and there are a few aprons worn by the maids on Downton Abbey that make me envious!