Thursday, September 26, 2013

Week 17: Print on Fabric


Ideas & Inspirations: Ever since I saw this DIY on Poppytalk's blog on how to Print Your Own Fabric, I wanted to give it a whirl! Not only did this project look easy to do, but it also required a very low cost investment, and that is so how I roll!

What I intend to do with said project: I have not decided what to make with my fabric once it is printed, but I'll add it to my fabric stash. Maybe it will end up being featured in a blog post down the road? Stay tuned!

Wednesday, September 25, 2013

Week 16: A Polkadot Apron Tutorial

I'm excited to finally show you my apron and show you how to make your own! I'm mostly settled into my new apartment now and am busy getting my new crafting area ready for some quality crafting time.


Materials:
-0.5m navy polkadot fabric
-0.75m bright pink fabric for band & strap
-scrap polkadot fabric for pockets
-2.5m of lace

Step 1: Cut Apron Pieces

Here are the measurements I used (length x width):

Top or 'Bodice' = 10" x 13"
Bottom  or 'Skirt' = 18" x 22"
Waistband = 76" x 4" (I pieced several strips together to get this length) Cut 2!
Neck strap = 20" x 3"
Pockets = 5" x 6"Cut 2!

Step 2: Trim

Round the top corners of the bodice piece and the bottom corners of the skirt piece.

With RIGHT sides together, trim the ends of your waistband on a 45-degree angle.

Step 3: Attach Lace


With right sides together, sew lace around the top and sides of the bodice using a zigzag stitch (seam allowance will depend on the width of your lace). Press seam to the inside and topstitch the edge, making sure to catch the seam underneath - this will keep your lace laying flat. Repeat for the bottom and sides of the skirt.

Step 4: Gather


Using a running stitch, gather a few inches on the bottom of the bodice and the top of the skirt. Stitch in place.

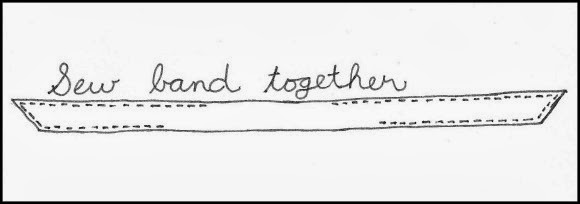
Step 5: Sew Band Together

With right sides together, sew the waistband pieces together, leaving an opening at the top wide enough for the bodice (approx. 13") and an opening on the bottom wide enough for the skirt (approx. 20"). Use a 1/2 inch seam allowance. Flip right side out and press.

Step 6: Piece the Apron Together


With right sides together, attach the bodice to the top front piece of your waistband and the skirt to the bottom front waistband. Use a 1/2 inch seam allowance. Press seams toward waistband.

Flip your apron over to the backside, and there will be two openings where the bodice and skirt pieces meet the waistband. Press the opening of the waistband under 1/2 inch. Pin in place so that the front waistband and back waistband are lined up. Then top stitch the entire edge of the waistband - this will close up the openings that were on the reverse side of the apron.

Step 7: Sew the Neck Strap


Fold the neck strap in half lengthwise with right sides together and stitch it up. Flip right side out, press and topstitch. (Okay, so topstitching is not totally necessary, but I'm so much happier with the end result when I do it!)

Step 8: Make the Pockets
Trim the bottom corners of the pockets to round them out.

Make a pleat down the middle of the pocket. Play around with pleats (or gathering) until you are pleased with the result. I ended up with a 1" wide pleat at the top and a 5/8" wide pleat at the bottom. Stitch in place.

With right sides together, sew the lace to the top of each pocket. Press the seam to the inside and topstitch.

Step 9: Attach Strap and Pockets
Pin your strap to the back side of the apron bodice. It's a good idea to try it on at this point and adjust the angle (or length!) of the strap to fit properly. Sew in place and reinforce by adding a second row of stitches 1/8" to 1/4" above your first row.

To attach the pockets, press under 1/4" along the side and bottom edges. Pin them to the apron skirt (again, try it on and adjust as necessary), and topstitch in place.

And now you have an adorable apron to wear whilst making pies or whatever your baking vice may be!


What I enjoyed the most: I really enjoyed making this apron pattern up as I went along. I am a fairly methodical type of person and like processes to be well organized. So it was a good exercise for me to freestyle my cutting, and not know where to place my pockets or how to attach the waistband. I just had to figure it out and make mistakes.

Next time I would...Play around more with the shape and maybe try a less conventional style of apron. I've made aprons before with a similar shape to this one, so maybe I should try something new? I'm intrigued by vintage aprons that look more like dresses and there are a few aprons worn by the maids on Downton Abbey that make me envious!

Wednesday, August 21, 2013

Week 16: Make an Apron


Why I want to make this: An apron is a perfect example of something I have made plenty of times, but never for myself. (Hint: Aprons make great handmade wedding presents!) 

Ideas & Inspirations: What I love about an apron is that it's one of the few items of apparel where it seems more than acceptable to be frilly, girly, cutesy-wutesy, and even downright ridiculous. And I do plan to make one that meets all of this criteria!

What I intend to do with said project: Wear it and make a pie! Seriously, I have recently taken quite an interest in pie-making. All I wanna do is make pie and wear an adorable apron!

Wednesday, August 7, 2013

Week 15: Create A Bouquet of Paper Flowers

Keep summer alive all year with this paper flower bouquet! These were so easy to make -I'll definitely make them again!


I started playing around with a few different materials and was able to create the white carnation and yellow daisy on my own. For the blue roses and the red anemone, I found a couple of great tutorials: DIY Crepe Anemone by Craftberry Bush & Paper Flowers by Haute to Sew.

White Doily Carnation Tutorial:

Materials:
  • 9 paper doilies
  • washi tape
  • craft wire
Step 1: Fold each doily in half 5 times. Don't be too fussy with your folding. The main purpose is to add texture and dimension.


Step 2: Unfold your doily & poke a small hole in the centre

Step 3: Tape one doily to your wire stem.


Step 4: Layer all doilies onto the wire stem. Poke the wire stem through each doily and slide them up to the top.


Step 5: Secure with washi tape. You can use floral tape also -I just couldn't get it to work for me! I chose to continue with the tape down the entire stem for a fun look.


What I enjoyed the most: I enjoyed creating and designing my own paper flowers. I let the materials I was working with (doilies and twist paper) inspire me and I was pleased with what I was able to come up with.

Next time I would... Invest in some new paper. I just went with what I had in my paper drawer and luckily the colours I had worked. But next time I would like to go to the craft store and carefully select the papers and colour palette I'd like to work with.

Friday, August 2, 2013

Week 15: Paper Flowers


Why I want to make this: This idea started when I was working full-time in a very beige, dull office space that was desperately in need of some colour. Even though I don't work in that space anymore, summer is whizzing by so fast (seriously, where did July go!?) and I figured I should capture the colours of summer to keep all year round!

Ideas & Inspirations: There are so many ideas and projects out there! I've started pinning some on Pinterest if you'd like to take a peak.

What I intend to do with said project: I'm hoping this will be a nice piece for the new place. Did I mention I was moving? Yeah, I've got a little basement suite I'll be moving into in September. A little colour for the new space perhaps?

Tuesday, July 30, 2013

Week 14: Simple Wall Art DIY

Painting is so not my forte, but I gave it a shot and ended up with this floral, pastel, geometric painting for my wall!


Supplies:
  • plywood
  • wood stain
  • cotton cloth
  • washi or painters tape
  • acrylic paints
  • paintbrushes

Step 1: Prepare the Plywood Canvas
I decided I wanted my plywood to be much darker in order to contrast well with my pastel palette of colours. So I stained my wood a 'walnut' colour before I started.

Step 2: Tape It Using my washi tape, I created some lines in a random criss-crossing pattern.


Step 3: Paint! 
Paint whatever you'd like! I must say that the final product was much different that what I originally had in my head. I expected it to be much more abstract, and much to my surprise, I had to remind myself not to be too detailed.


Step 4: Remove the Tape
Once your paint is fully dry, carefully remove the tape, being careful not to remove any extra paint.
And the tape was quite pretty too!


What I enjoyed most: I enjoyed experimenting as I painted. Being a novice, it was fun to accidentally discover what my brush could do.

Next time I would... Create something much more abstract. I think the wood lines would better compliment an image that was sort of a mish-mash of colours coming together.

Wednesday, July 24, 2013

Week 14: Paint Something


Why I want to make this: I consider myself an artist but I am SO not the drawing/painting type of artist. I want to do this project to challenge myself and try something I'm a little uncomfortable doing.

Ideas & Inspirations: Instead of using a traditional canvas, I'd like to use some plywood that I picked up at the Reuse Centre recently. I am naturally drawn toward more abstract paintings because I think that's where my brain works best! But we'll see what I end up creating.

What I intend to do with said project: This is the perfect type of project to hang in the craft room! It will serve as a reminder to challenge myself more often. Hopefully it will turn out to be something inspiring for me and not something that will discourage me when I look at it.